
Right, let’s get something straight from the off: that photo on your phone of the sunset that looked absolutely stunning in person? The one that made you actually waste? It looks rubbish, doesn’t it? Flat, lifeless, nothing like what your eyes saw. And you’re standing there thinking, “But it was so beautiful!” Welcome to the eternal frustration of travel photography, mate.
I’ve spent fifteen years dragging camera equipment through airports, up mountains, and into situations where any sensitive person would’ve left their gear in the hotel. I’ve photographed everything from wildlife in remote African reserves to street scenes in cities where my camera cost more than most locals earn in a year. And here’s what I’ve learned: taking amazing travel photos isn’t about having the fanciest kit or knowing every technical setting. It’s about seeing differently and being prepared when moments happen.
The Brutal Truth About Travel Photography
Most travel photos are forgettable. There, I said it. Scroll through any travel hashtag on Instagram and you’ll see the same compositions repeated endlessly that photo from the exact spot where everyone stands, the “candid” shot that’s clearly staged, the sunset that looks like every other sunset photo ever taken.
The photos that actually make people stop scrolling? Those come from photographers who’ve learned to see what everyone else walks past. It’s not magic; it’s a skill you can develop. But it requires you to slow down when every instinct screams at you to rush from attraction to attraction, ticking boxes on your itinerary.
When I first visited tourist attractions in South Africa Table Mountain, specifically I made every rookie mistake possible. Shot at midday when the light was harsh and unflattering. Positioned myself exactly where the guidebook suggested. Came away with technically acceptable photos that looked like everyone else’s. They were fine. Just fine. And in photography, “fine” is another word for “forgettable.”
Light: Your Most Important Piece of Kit
Here’s something that’ll save you thousands of pounds and years of frustration: the best camera in the world can’t fix bad light, but good light can make a phone photo look professional. Light is everything not your lens, not your megapixels, not your fancy editing software.
Golden hour that magical window just after sunrise and before sunset exists for a reason. The light’s warm, soft, directional, and forgiving. Shadows have detail. Colors pop without looking artificial. During my last shoot in the Cape Winelands, I woke up at 4:30 AM to catch sunrise over the vineyards. Was it pleasant? Absolutely not. Were the photos worth it? Beyond question.
Midday light is harsh, unflattering, and creates shadows that look like someone’s taken a marker to people’s faces. But here’s the twist: if you’re shooting architecture or certain landscapes, that strong directional light can create dramatic effects that golden hour simply can’t match. The key is understanding what you’re working with rather than fighting against it.
Overcast days? Brilliant for portraits and street photography. The clouds act as a massive diffusion, creating even, flattering light. I’ve shot some of my favorite travel portraits on gray, miserable days that had tourists grumbling about the weather.
Your Gear Actually Matters (But Not How You Think)
Let’s address the elephant in the room: yes, professional photographers use professional cameras. The right camera equipment makes certain shots possible that simply aren’t achievable with a phone. A proper camera gives you control over depth of field, shutter speed, ISO, focus points that phone computational photography can’t replicate, regardless of what marketing departments claim.
But here’s what matters more than your camera body: knowing your gear inside out. I’ve seen photographers with £5,000 setups producing mediocre work because they’re still fighting with their equipment. Meanwhile, someone with an entry-level camera who knows exactly how it behaves in different situations will consistently nail shots.
If you’re serious about travel photography, invest in a solid tripod . Not a flimsy travel one that’ll blow over in a stiff breeze, but something that can hold your gear steady when you’re shooting long exposures of waterfalls or trying to capture star trails over the Serengeti. Yes, it’s extra weight. Yes, you’ll occasionally resent carrying it. But the first time you nail a silky-smooth waterfall shot or capture the Milky Way in proper detail, you’ll forget every moment you cursed its existence.
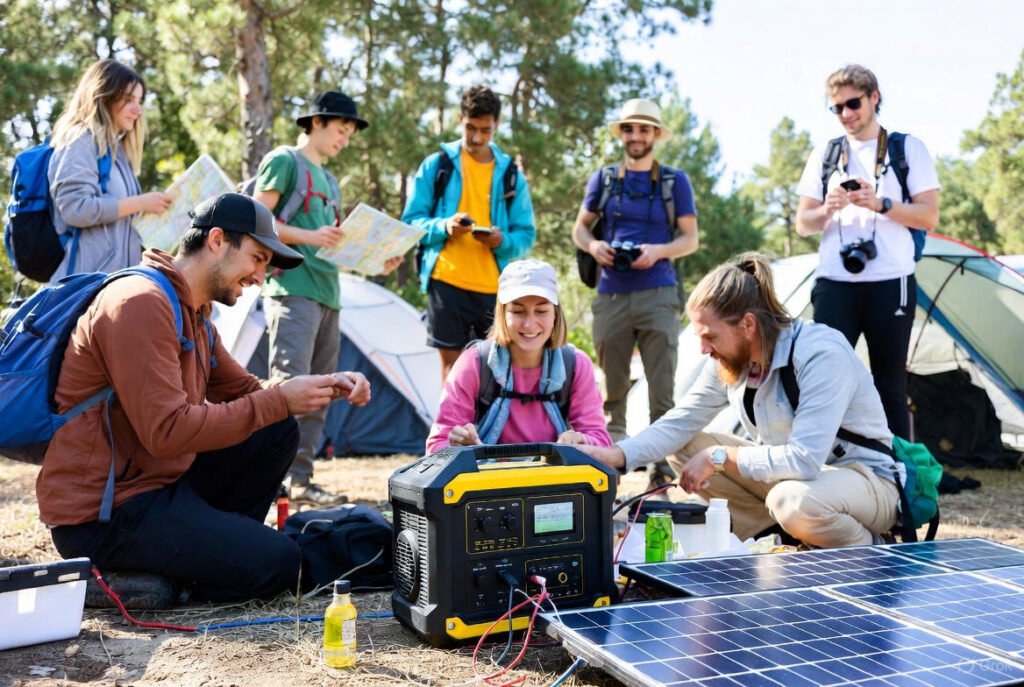
And here’s something most photography guides won’t tell you: a portable solar generator is an absolute game-changer for serious travel photography. When you’re spending days in remote locations safari lodges, wilderness camps, anywhere without reliable electricity being able to charge multiple batteries, laptops, and phones means you’re not rationing power like it’s 1942. I learned this the hard way after missing sunset shots because every battery I owned was dead and I was three hours from the nearest plug socket.
Composition: The Difference Between Snapshots and Photographs
The rule of thirds gets beaten to death in every photography tutorial, and honestly? It works. Placing your subject off-center creates tension and interest that centered compositions often lack. But like all rules, once you understand it, you can break it deliberately for effect.
Leading lines roads, rivers, fences, shadows draw the viewer’s eye through the image. When shooting landscapes, look for these natural guides that create depth and movement. During a shoot at the Blyde River Canyon, I spent twenty minutes walking the viewpoint until I found an angle where the river carved a perfect S-curve through the frame, leading from foreground to that ridiculous view in the distance.
Foreground interest transforms decent landscape photos into compelling ones. That sweeping vista looks more impressive when you’ve got interesting elements in the near field rocks, flowers, people, anything that gives the image layers and depth. Your brain knows things should look three-dimensional; photos that honor that feel more immersive.
And please, for the love of all that’s holy, check your horizons. Wonky horizons are like nails on a chalkboard for anyone with basic visual literacy. It takes two seconds to straighten in post-processing, but it’s better to get it right in camera.
The Magic of Perspective
Want to know the quickest way to make your travel photos look different from everyone else’s? Change your perspective. Stop shooting everything from standing height. Get low really low, lying on the ground if necessary. Shoot from above. Find unexpected angles that show familiar subjects in unfamiliar ways.
I once spent an hour photographing Cape Town’s colorful Bo-Kaap houses. The standard shot everyone takes shows the street at eye level. Fine, but predictable. I experimented with shooting from ground level looking up, emphasizing the cobblestones in the foreground with the houses beyond. Then climbed onto a rooftop for an elevated perspective that showed the geometric patterns the houses created when viewed from above. Those photos got far more attention than my technically superior but compositionally boring eye-level shots.
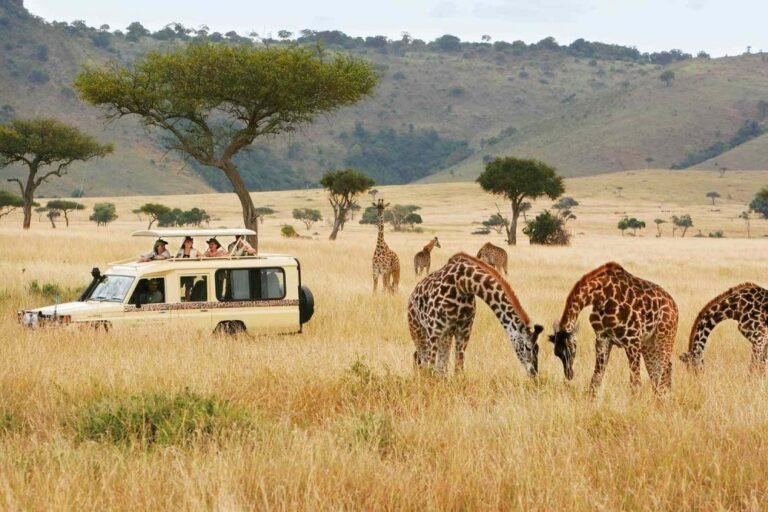
Wildlife photography demands especially creative perspectives. Everyone shoots elephants at eye level from a Land Cruiser. Getting down low carefully and safely, with a guide who knows what they’re doing so you’re photographing from the animal’s perspective rather than looking down at it creates much more engaging images.
Drone Photography: A Different World
Aerial photography has transformed how we capture landscapes and travel destinations. What was once the exclusive domain of helicopter charters costing thousands is now accessible to anyone willing to invest in a decent drone and learn to fly it safely.
But and this is crucial flying drones internationally comes with serious legal and ethical considerations. Many tourist attractions ban drones entirely. National parks frequently prohibit them to avoid disturbing wildlife. Some countries require permits, licenses, or both. Before you even pack your drone, research regulations for your destination. The fine for illegal drone operation can easily cost more than the drone itself.
When you can fly legally, drones reveal patterns and perspectives impossible from ground level. Coastlines become abstract art. Cities transform into geometric puzzles. Natural features show relationships and scale that ground-based photography simply can’t capture.
People Make Places Come Alive
Landscapes are lovely, but people make travel photos resonate emotionally. A beautiful beach is just a beach; add a local fisherman mending nets, and suddenly there’s a story.
But photographing people especially in foreign countries requires sensitivity and respect. Always ask permission, and accept refusal gracefully. Learn to read body language; sometimes people agree verbally but their discomfort is obvious. In those situations, thank them and move on.
In many African destinations, there’s complex colonial history around photography and exploitation. Being a respectful photographer means understanding this context. It means not treating locals as props for your travel portfolio. It means actually engaging with people rather than just capturing their image.
Pay for portraits when appropriate. In tourist areas where people pose for photos regularly, offering payment acknowledges their time and the value their participation adds to your work. It’s not exploitative; it’s fair exchange.
The Technical Stuff You Actually Need to Know
Exposure triangle basics aperture, shutter speed, ISO matter less than understanding how they interact. Wide aperture (low f-number) blurs backgrounds beautifully but reduces depth of field. Fast shutter speeds freeze motion but require more light. High ISO lets you shoot in low light but introduces noise.
The best setting depends entirely on what you’re shooting. Wildlife in motion? Fast shutter speed is non-negotiable. Landscape where you want everything sharp? Higher f-number (smaller aperture) increases depth of field. Low light conditions? You’ll need higher ISO or a tripod for longer exposures.
Shoot in RAW if your camera allows it. Yes, the files are massive. Yes, they require post-processing. But the flexibility in editing recovering blown highlights, lifting shadows, adjusting white balance makes it worthwhile for any photo you might want to print or publish professionally.
Learn your camera’s autofocus system. Modern cameras have sophisticated AF with multiple modes and settings. Sports/continuous mode for moving subjects. Single-point for precise control. Zone/group AF for wildlife where the subject might move unpredictably within the frame.
Post-Processing: The Part Nobody Photographs
Every professional travel photo you’ve ever admired has been edited. Every single one. “Straight out of camera” might sound pure, but professional photographers understand that editing is where you translate what you saw emotionally into what the camera captured literally.
Learning basic editing exposure adjustment, color grading, sharpening, noise reduction transforms your photos from good to great. You don’t need Photoshop; Lightroom or even capable phone apps can handle 90% of what most travel photographers need.
But editing can’t fix fundamental problems. Poor composition, terrible light, missed focus these aren’t fixable in post. Editing enhances good photos; it can’t rescue bad ones. Get it as right as possible in camera, then use editing to refine rather than rescue.
Planning Makes Perfect (Or at Least Better)
Research your destinations thoroughly. Scout locations on Google Maps and Instagram to identify promising shooting spots. Check sunrise/sunset times and moon phases. Understand seasonal weather patterns when I planned photography-focused trips through African destinations , knowing wet vs. dry seasons were crucial for both logistics and photographic opportunities.
Create shot lists for must-have images but stay flexible enough to capture unexpected moments. Some of my best photos happened because I was paying attention when something unplanned occurred, not because I rigidly followed a schedule.
Weather apps are essential, but also understand that dramatic weather often creates the most compelling photos. Storms, fog, unusual light these “bad” conditions frequently produce far more interesting images than perfect sunny days.
The Shots Everyone Misses
Dawn and dusk get all the attention, but blue hour that brief window after sunset or before sunrise when the sky turns deep blue creates magical urban photography opportunities. City lights are on, there’s still color in the sky, and the quality of light is extraordinary.
Look for reflections puddles after rain, polished floors, windows, bodies of water. Reflections add depth and interest, transforming ordinary scenes into something more compelling.
Shadows and silhouettes at sunrise or sunset can be more powerful than fully-lit subjects. Don’t be afraid to underexpose deliberately, creating dramatic contrast that emphasizes shape over detail.
Details matter as much as grand vistas. The texture of weathered wood, patterns in traditional textiles, close-ups of local food these small-scale subjects tell the story of a place as effectively as sweeping landscapes.
Why This Actually Matters
Travel photography isn’t just about collecting pretty pictures for Instagram. It’s about creating visual memories that transport you back to moments long after you’ve returned home. It’s about seeing places more deeply because the act of photographing forces you to observe rather than just look.
Good travel photography makes you a better traveler. You slow down. You notice things. You engage more thoughtfully with places and people. The camera becomes a tool for deeper connection rather than a barrier between you and experience.
And honestly? There’s something deeply satisfying about creating images that make people stop scrolling, that make them feel something, that make them want to visit places they’d never considered. That’s the real reward not likes or follows, but creating work that moves people.
Just Start Shooting
Here’s the thousands uncomfortable truth: you’ll take of mediocre photos before you consistently create great ones. There’s no shortcut. Every professional photographer you admire has a hard drive full of failed attempts, missed moments, and experiments that didn’t work.
The difference between them and everyone else? They kept shooting anyway. They learned from failures. They studied what worked and what didn’t. They developed their eye through practice, not by reading tutorials.
So stop overthinking it. Get your gear sorted , research your destinations, understand the basics, and then just go shoot. Make mistakes. Miss shots. Take photos that embarrass you when you review them later. That’s how you learn.
Your travel photos will improve not because you bought better equipment or memorized more rules, but because you trained yourself to see better. And that only happens through doing the work.
Now get out there and create something brilliant.
Serious about travel photography? We’ve partnered with trusted providers for professional camera gear , reliable tripods , quality drones , portable power solutions , and photography-focused African tours . Each purchase supports this blog at no extra cost to you.